How to build the best Raspberry Pi media server
Make your own set-top box

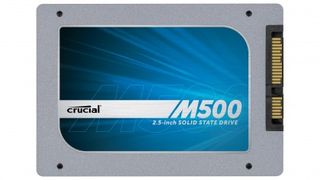
In terms of memory, 4GB is ample, while you might want to investigate the fastest boot media you can find, so powering up your server takes seconds rather than minutes. That means a fast SD card, USB flash drive or SSD hard drive - assuming your media is stored on another drive, you only need a boot partition of around 8-32GB in size to cover your needs.
You'll obviously also need a hard drive to store your media on - internal or USB 3.0 is preferable, but even USB 2.0 is quick enough for streaming purposes.
Depending on where you site your media server - if it's doubling up as a media centre in the living room, then it might be hidden under the TV - you might also want to consider investing in a wireless keyboard/mouse combination. For those on a tight budget, Ebuyer's own Xenta Wireless Touchpad Keyboard is a good choice, and we've tested it successfully with XBMCbuntu.
One final consideration is your network. If you can plug your media server directly into your router, then that's all well and good, but if it's too far away then be prepared to invest in a HomePlug/Powerline network adaptor from the likes of Faculty-X if you find HD files stuttering over Wi-Fi. Pick a 500Mbps pass-through model with Gigabit ports for maximum performance.
Choose your media server

As you're going to use this machine as a dedicated media server, there's no need to install Windows - or indeed a vanilla Linux build - on it. Instead, we recommend you install a customised version of XBMC configured to work straight out of the box.
You've got two basic choices here. OpenElec is the more streamlined version, perfect for lower-end PCs and designed to run direct from an SD card or USB flash drive. Those wanting optional access to the underlying Ubuntu OS for more advanced tweaks should consider XBMCbuntu instead.
In both cases you'll need to download the correct version for your principal chipset: XBMCbuntu offers a choice of AMD or Intel/Nvidia, while OpenElec has builds for ION, Fusion, Intel and Atom among others. If you can't identify the correct one using the FAQ, choose one of the two generic builds.
Are you a pro? Subscribe to our newsletter
Sign up to the TechRadar Pro newsletter to get all the top news, opinion, features and guidance your business needs to succeed!
XBMCbuntu downloads a basic ISO file that you burn to a CD or USB stick. OpenElec is installed from a USB drive, and a Windows installer (create_livestick.exe) is provided to make the process as simple as possible.
You then simply boot from your CD or USB stick and follow the instructions to either run as a Live CD or install to your chosen drive - internal hard drive, USB stick or SD card.
Configuring XBMC

Take the time to familiarise yourself with how XBMC works - you'll find both the XBMC Wiki and OpenElec Wiki are invaluable here. Start by running through the System > Settings section to configure how XBMC is set up - if you're using it as a media server, for example, visit Services > UPnP to select Share video and music libraries through UPnP, and switch it on.
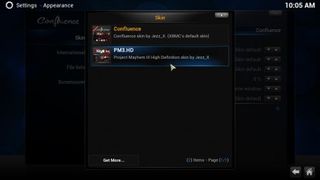
If you plan to hide away your media server from view, and don't want to have it hooked up to a keyboard or monitor, then select Services > Webserver to make it possible for you to control your media server from another computer on your network via its web browser. Don't like the default skin? Change it from the System > Settings > Appearance > Skin section. If you're hankering for a vertical theme, try PM3.HD.
When it comes to adding video and music to your libraries, take the time to make sure they're named correctly with the help of our guide. This ensures they'll appear correctly in XBMC, making it easier to find the TV episode or movie you're looking for.
