
 Become a TechRadar Insider


Paying someone to host your website can be tempting. There's usually a point-and-click installation for any services you require, plus cheap monthly prices that include storage and maintenance, and there are often generous bandwidth allowances too.
It's not much fun though, and if you want to add any advanced features - such as shell access to your server or a non-shared host - costs soon ramp up.
Serve yourself
The solution to all of these problems is to run your own server, and it's not as difficult or insecure as you might think.
With the latest version of Ubuntu, for instance, you can install the Apache web server with just a couple of clicks, and because this is the LTS (or Long Term Support) version, you'll receive five years of security updates for free (the desktop version is only supported for three years). As long as your system is up to date and your passwords are secure, it's highly unlikely that anyone will be able to break into it.
Combine this with the upload speeds many people enjoy at home, and you've got a viable alternative to cheap shared hosting that's fun to install, gives you more control over the configuration, and is better suited to the low-bandwidth sites many of us like to run as a hobby.
You'll also learn a lot in the process. That's why we're going to show you how easy it is to create a Linux server, install a LAMP stack into it, get Apache running and serving web pages, and then install the world's most popular content management system - WordPress.

After that, world domination is up to you and your cookery/1980s platform games/analogue monosynth blog. Unlike the live desktop CD that most regular users use to install Ubuntu, the server edition gets you prepared for life on the command line by keeping to it.
This isn't as bad as it sounds, because it's really just a series of menus. You're also asked almost exactly the same questions as for the desktop version, so there's no extra skill required.
Boot from the Ubuntu server CD and choose 'English' and 'Install Ubuntu Server' from the options that appear. Now choose your language again, your timezone, and your keyboard layout.
After a brief configuration delay, you'll get to the networking section. First it asks for a hostname; you just need to make sure this is a unique name rather than letting all the machines on your network use 'ubuntu'. Now enter a username and password. You want to make these as secure as possible - using an unpredictable name and a difficult password, for example - because you don't want someone guessing the values if you run SSH for remote access.
Partitioning

The next major step is disk partitioning, and the most straightforward approach is to give the server a complete disk. We also recommend the second option from the disk partition menu, as this formats the complete disk with an LVM configuration.
LVM is a disk management system that creates virtual partitions from one or more disks, and it means you can easily expand them as your needs grow, without the tedious tasks of migrating data from one drive to another.
Answer all further questions with their default values. Be warned, this will remove any data on your chosen drive.
Leave the package management proxy question blank, but in the following question, we suggest 'Install security updates automatically' is a better choice than the default one, especially if you're going to leave the machine running and connected to the internet.
Pick a server

The final stage of the installer lets you pick and choose any of the servers you might want to install. This is so Ubuntu can manage the processes from boot time without any further interaction from you, so it's a good idea to at least install the basic packages.
We'd recommend selecting the OpenSSH Server and LAMP Server as a good starting configuration. OpenSSH is one of the most powerful tools available for Linux because it lets you access the command line securely from any remote location, as long as port 22 is forwarded to your machine through any firewall. It also means that you can disconnect the keyboard, mouse and screen after you've set up your server machine on your local network, because you'll be able to do everything else using a remote SSH connection.
You've probably heard of LAMP. It stands for Linux/Apache/MySQL and PHP, and these four technologies have helped transform the world wide web for companies like Facebook and Twitter.
Apache is the web server itself, allowing you to host sites and for them to be accessed from across the network.
MySQL is a database server, commonly used by the likes of Wordpress to store things like posts, comments and forum chatter. It might sound a little 'enterprise' to be installing something like this on your humble server, but it's a service that runs well on slower machines and can scale to meet your needs.You can give the installer a root password for this, which we recommend if you're going to use it online.
PHP is the programming glue that binds this together. Don't let talk of programming put you off, though. You usually install pre-baked PHP packages rather than coding your own solutions, so you'll never need to touch the code.
Port forwarding
With your servers selected, continue with the installation. After a few minutes, the final question will ask whether you want to install the Grub boot loader into the master boot record. You should select 'Yes' unless you're running your server alongside a Windows installation. You'll then be able to restart your machine and remove the bootable disc.
After restarting, you won't see a desktop or graphical login screen. Instead you'll see a monochrome command prompt asking you to log in. Use the account credentials you created from the installer to log in, and you'll find yourself at the command line.
We first want to discover the IP address of the server, and this should be displayed as part of the login overview you see above the command prompt. Look for the line 'IP address for eth0'. This IP address is important because you want to run your machine as a server. On most networks, it will be given to your machine by a DHCP server running somewhere on your LAN, usually tucked away on your router or modem. Most of the time this address will be the same, but there's no guarantee because it's allocated dynamically according to demand.
With the server up and running, the easiest solution for most routers is to use its web interface to give our Ubuntu server a static address. Each router is different, so we can't provide instructions, but the task is usually straightforward.
While you're in the web interface, you will also need to open a couple of ports in your firewall and then forward these to your Ubuntu server. These ports will depend on which servers you're running, but for a web server and OpenSSH, it will be ports 80 and 22 respectively.
Check out the server

This is all the configuration that's needed. You can now point a browser at the internet-facing IP address provided by your ISP, or your server's IP address on the LAN. The infamous 'It works!' message will be delivered by Apache.
Your server is now ready for your web masterpiece. This isn't the place for a tutorial on HTML or PHP, but the /var/www/index.html file is a good place to start, because this is what's read to create the 'It works!' messages served by Apache. Edit this file and your website changes.
The other server we installed was OpenSSH, and you can also make use of this from any SSH client - Putty on Windows, for example, or the ssh command from any Linux machine. Type ssh followed by the IP address of your server and you'll see the same login screen you do when you start your machine. Log in and you'll be able to do everything you can from the machine, only remotely. This means you can now hide your server away somewhere and use a remote connection when you need to change things, either from the internet or from your LAN.
Most people don't build a website from scratch (although the world might be a better place if more people had to), so we're going to install a pre-built web framework that should make it easy to get your content online from your own server.
The software we're going to install is WordPress, which is probably the world's most popular blogging platform. There's more to it than blogs though - it's a comprehensive and easy to use content management system that can be easily augmented and themed using its fantastic plug-in system. All it needs is Apache, MySQL, Linux and PHP - all of which we've already covered.
Install Wordpress

The first step is to grab the Ubuntu packages for WordPress by typing sudo apt-get install wordpress. Unfortunately, this doesn't include any configuration.
Once the packages are installed, we first need to create a symbolic link from the folder where WordPress is installed to the folder that Apache is using to serve content.
This can be done by first removing the old www folder with the command sudo rm -rf /var/www, and then replacing it with the link by typing sudo ln -s /usr/share/wordpress/var/www/.
We now need to run a script that will create the MySQL database for us automatically. This can be done with the following command: sudo bash /usr/share/doc/wordpress/examples/setup-mysql -n wordpress 192.168.133.54
Here, 'wordpress' is the username for the database, and '192.168.133.54' is the IP address of the server from which you need to access it. If you want access from the internet, it needs to be your connection's IP address rather than that of the server on your LAN.
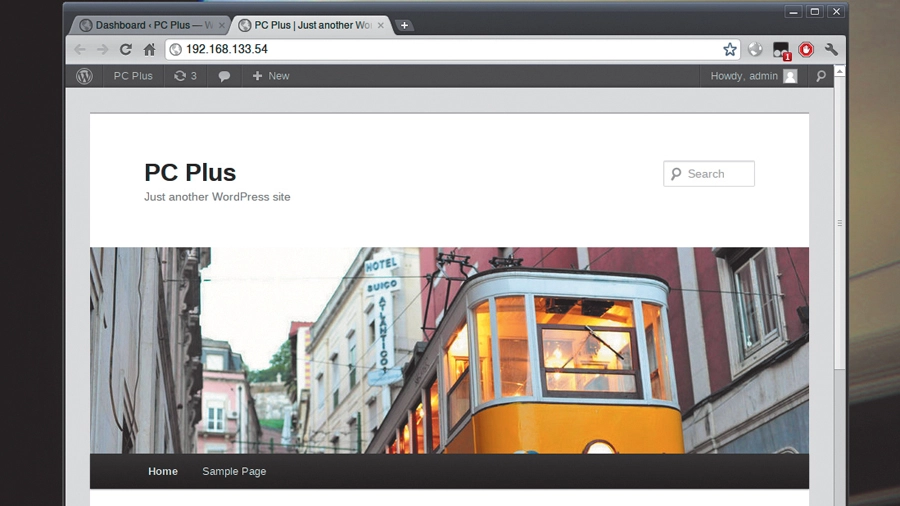
With a bit of luck, when you point your browser at the server, the 'It Works' message will have been replaced by the WordPress installation screen.
The final steps are to walk through this easy installation to build your required setup. Just enter a site name, email address and password. A few moments later, you'll find yourself with a fully fledged WordPress installation. Log in and start playing.
- Check out the best website hosting services