How to master iPhoto's export options
Take control over the size and format of the files you create

When you want to get your images out of iPhoto to save to a flash drive, or upload to your Facebook gallery, it's easy. You just drag them onto your Desktop. Tutorial over? Not quite. While simply dropping them on your Desktop works, you can get much more control over the type of file that results by using iPhoto's built-in export options.
Why might you need to do this? Well, what if you need to change the file format? You might like to change that nice fat TIFF into a skinny little JPEG to put up on the web, or maybe your image is a JPEG that you'd like to preserve the quality of and want to save as a lossless PNG or TIFF file. Or you may need to export an image in a not-so-common format like a GIF, a Photoshop file, or even a Microsoft BMP file. You can do all these and more with iPhoto's export options combined with the Preview application, which is already built into your Mac.
iPhoto can export images in JPEG, PNG or TIFF file formats, while Preview gives you options not yet mentioned, including: JPEG-2000, OpenEXR, PDF, PICT, SGI and TGA. We'll show you how to combine the two applications together in this tutorial.
Don't forget, iPhoto also allows for custom resizing when you export, should you want to make your image smaller than the original. Follow the step-by-step guide below to become a master of iPhoto's export options.
1. Open iPhoto and find your image or images. If you're exporting a single image, click on it to highlight it. If you're exporting a series, click on the first image and S-click on the last image to highlight them. If you want to export an album, open it and press C+[A] to highlight all. Then click on the File menu and choose Export.
2. Click on the File Export tab and choose the image format you want to export in from the Kind list. Even if exporting to the same format, choose the image format type from the list instead of Original or Current. The Original and Current choices won't give you some of the exporting options that may be available.
3. If exporting to JPEG you can choose the quality or compression ratio. PNG and TIFF, which are lossless formats, don't allow you to change quality. If exporting for printing, you'll want Maximum quality; if you're posting them to the web, you'll want Medium or Small to save space. JPEG also allows you to add a title and keywords.
Get daily insight, inspiration and deals in your inbox
Get the hottest deals available in your inbox plus news, reviews, opinion, analysis and more from the TechRadar team.
4. Choose the resolution from the Size list. All choices except Full Size will shrink the number of pixels. This reduces both the physical size and the quality of your image. The Custom Size allows you to reduce to whatever pixel dimensions you'd like. Enter the maximum number of pixels you'd like for height, width or dimensions.
5. For File Name you can choose the current filename, the title that you've given the image in iPhoto, a named sequential order, or an album name. The Sequential and Use Album choices are mostly useful when batch processing images. Photos will give them the album name or title of our choice followed by a number in sequence.
6. Choose a location where you'd like to export the image or images. When batch exporting, it's best to create a new folder for the images to easily keep them together or move them around. Click on the New Folder button and name it something similar or the same as the images. Click on the OK button to export.
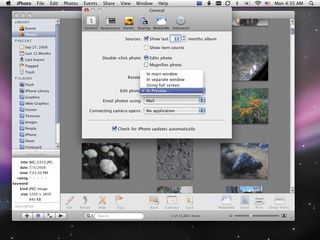
7. Open up your Preview application; it will either be in your Dock or in your Applications folder. Drag the photo directly from iPhoto to the Preview icon that's open in your Dock. If you drag an unedited RAW file from iPhoto it will be converted into a JPEG.
8. It's easier to process images in Preview one at a time. Click on the File menu and choose Save As. JPEG will allow you 10 levels of compression; JPEG-2000 allows for a lossless save; PDF gives you the options of quartz filters and encryption; TIFF allows for some lossless compression options. Choose your location and click Save.
First published in MacFormat issue 202
