Get the most from the kit lens on your new camera
You don't have to use expensive lenses to get great shots
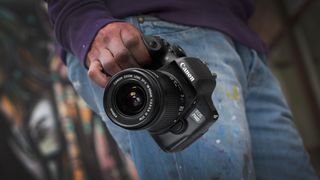
The lens that comes with your new camera is often referred to as the 'kit lens' and it's a great way to get started with a new camera or when changing from one camera system to another.
When buying a new DSLR or mirrorless camera, these lenses are often bundled with it for not much more than the body-only price, so for this reason alone it makes buying a kit lens a worthwhile investment.
Normally covering a broad focal range, from moderate wide-angle to short telephoto (18-55mm on most entry-level DSLRs or 14-42mm on Micro Four Thirds), these lenses allow you to shoot a range of subjects if you're just starting out on your photographic journey and haven't started to look at other lenses.
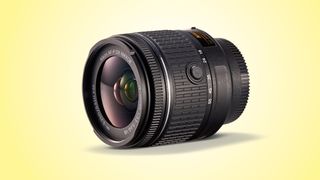
However, the lens itself won't necessarily be the best optic available for specific types of photography, while the relatively slow variable maximum aperture (normally f/3.5-5.6) means they can make some photography a little restrictive at times. Don't let that put you off though. Armed with our expert tips and tricks, you'll be able to achieve stunning shots with your humble kit lens.
Shoot landscapes like a pro
Landscape photography is one of the most popular genres, and your kit lens is perfect for taking fantastic scenic shots. All you need to do to get started is to set the focal length to its widest setting. This will give you a wide field of view; perfect for taking in an entire scene. We'd also recommend using a tripod to avoid any risk of camera shake.
The next thing you'll need to do is set the camera to aperture-priority mode, which is done by turning the mode dial to A or Av. This allows you to control the aperture and depth-of-field, while the camera automatically sets an appropriate shutter speed. Then set the aperture to the 'sweet spot' setting of f/11.
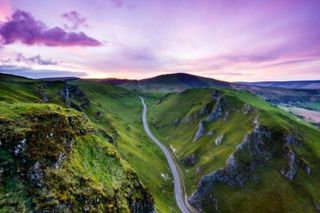
The sweet spot of the lens is the aperture at which a lens produces the best possible image quality, and kit lenses perform very well at this setting or thereabouts.
Get daily insight, inspiration and deals in your inbox
Get the hottest deals available in your inbox plus news, reviews, opinion, analysis and more from the TechRadar team.
To focus a landscape correctly set the lens to manual focus and turn on Live View - this means you can be much more precise with your focusing.
Zoom into the image on the LCD screen so you are looking at a position that's one third of the distance into the scene. Now, rotate the focusing ring or the front of the lens until the image looks sharp. Zoom back out of the image on screen and start shooting - you should find that you'll get your sharpest shots ever!
Take better portraits
When you're taking portraits with your kit lens there's a quick and easy way to instantly improve your shots. Turn the zoom ring until the lens is at the longest focal length, which on many kit lenses will be 55mm. This focal length provides a comfortable distance between you and the model/subject, and reduces the risk of distorting their features by using a wide-angle focal length and getting too close.
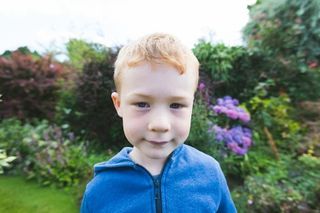
Switch your camera to aperture-priority mode, which is usually represented by A or Av on the mode dial. For some cameras this may need to be set through the camera menu. Next set the aperture to f/5.6 because this is the maximum aperture setting you can use when the camera is zoomed in to 55mm. This aperture combined with the focal length will give you the best chance of blurring the background so it's not distracting.
Now all you need to do is position your model a few metres in front of a plain background such as bushes, a fence or a wall etc. Then by moving position rather than zooming to frame your shot, you can compose your image and start shooting.

Get closer to the natural world

To shoot great close-up shots of flowers and insects, don't you need a dedicated macro lens or other specialist accessories? The honest answer here is not necessarily. While a kit lens alone won't get you all that close to the minutiae of the natural world, a simple and inexpensive accessory will transform it into a macro lens.
Reversing rings have a lens bayonet mount on one side, and a filter thread on the other. This allows you to screw the ring onto the front of your lens, and then to attach it to the camera backwards using the lens mount on the other side. One of the problems with using a reversing ring with a kit lens is that without taking advantage of a simple trick while the lens is mounted backwards, the aperture will remain wide open and depth-of-field will be incredibly shallow (there won't be much of the subject in sharp focus).
How to use a reversing ring with Canon kit lenses
Mount the kit lens on your camera the normal way, with the reversing ring attached to the front, and in aperture-priority mode set the aperture to f/8. Now hold down the depth-of-field preview button and keep it held down while pressing the lens release button and twist the lens to remove it. The aperture will now be set at f/8, and you can re-attach the lens to the camera by the reversing ring. This trick may also work for other camera brands, but not Nikon kit lenses.
How to use a reversing ring with Nikon kit lenses
With a Nikon kit lens simply attach the reversing ring to the front of the lens, and attach the lens backwards using the bayonet mount on the reversing ring. With the rear lens element facing outwards you'll see a mechanical lever – this controls the aperture. Now by moving the lever and holding it in position, around the centre of its travel, you will have aperture set to roughly f/8. The downside is that you have to hold it in position while shooting.
Setting the focal length of the lens to 18mm allows you to focus closer to the subject for a close to macro shot. While 55mm will allow you to focus further away for a close-up, but not macro shot. To focus simply move the camera backwards and forwards slightly until the image looks sharp in the viewfinder.

Take more control
To say that a kit lens is a jack of all trades master of none is a tad unfair. They are versatile and not aimed at one or two specific types of photography. But by simply taking a little more control and thinking about the camera and lens settings you're using, they can be great for many subjects. Next time you're out shooting give the techniques we've looked at here a try, and you're sure to see an instant improvement in your landscapes, portraits and close-up photography.
James Abbott is a professional photographer and freelance photography journalist. He contributes articles about photography, cameras and drones to a wide range of magazines and websites where he applies a wealth of experience to testing the latest photographic tech. James is also the author of ‘The Digital Darkroom: The Definitive Guide to Photo Editing’.
