How to master iOS 10’s Music app
Mobile music

From the reception given to Apple Music’s integration with iOS 9’s Music app, you may have wondered how the company behind the wildly popular iPod could also be responsible for something so confusing.
Apple listened and has cleaned up the app in iOS 10, refining how you work with your own music and the massive selection available through its subscription service.
However, among the changes is one that may require you to think a bit harder at first, because devices without 3D Touch make use of a gesture that’s rarely found in Apple’s own iOS apps.
- For more guides check out our collection of how to use iOS 10 articles
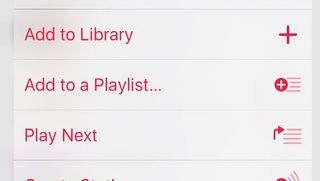
Notice that the there’s no longer an ellipsis next to library items, which used to reveal contextual commands. On a device with 3D Touch, you only have to press firmly on an item to reveal the same options, but on those without it you have to hold a finger on an item for a couple of seconds instead.
This works on song and artist names in the alphabetical lists, album and playlist artwork, and even the Mini Player bar that appears across the bottom of the screen when music’s playing or queued up.
The actions available differ by item, but they generally include adding it – whether it’s one track or a collection of them – to a playlist or the queue, downloading it so you can play it while offline, or marking it as something you love or dislike in order to influence the suggestions that appear in the For You tab.
Digging in the dirt
You’ll find an important new item called Optimise Storage listed under the Downloads heading in Settings > Music.
Get daily insight, inspiration and deals in your inbox
Get the hottest deals available in your inbox plus news, reviews, opinion, analysis and more from the TechRadar team.
However, it’s only present if iCloud Music Library is enabled further up the page; the feature complements an Apple Music or iTunes Match subscription because iOS knows it can reclaim space used by music safe in the knowledge that you can reacquire from your iCloud Music Library any tracks it removes from your device.
When this feature is off, iOS doesn’t touch your music when it needs space to download an app or play other media. When it’s switched on, you can tell iOS to retain no less than a certain amount of music on your device, or you can choose None to give it free rein to remove all of your music if need be.
If you prefer to manage things manually, you can now do this from the app’s own page in Settings, rather than having to dig around elsewhere.
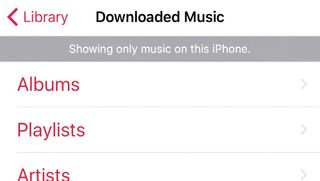
Tap Downloaded Music (even if you sync music from iTunes on your Mac) for an overview of what’s using space. Whether you are at the list of artists, a particular one’s albums, or a specific album’s track list, you can quickly reclaim space by swiping left on any item and then tapping the Delete button.
If you’re not interested in Apple Music, you can switch it off in Settings > Music. This hides For You and Discover, but moves Connect – posts from artists and curators – to the bottom bar.
As in iOS 9, you can hide Connect by going to Settings > General > Restrictions and turning off the switch labelled Apple Music Connect.
This leaves Library, Radio and Search in the bottom bar. Sadly, there’s no way to separate out the Playlists view from your library, as you could in iOS 9. Even so, this give you with a much leaner and more efficient view of mostly just music you own, if that’s all you want.
How to browse and interact with Apple Music in iOS 10

1. Browse your library
Your music collection has moved from the rightmost position in the bottom bar to the leftmost spot.
Note that on iPad there’s no longer a separate Playlists icon in the bar; they’re available through the pop-up at the top left of the Library page.
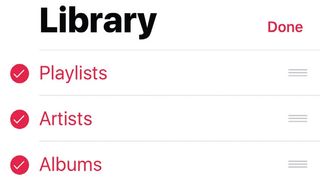
2. Customise categories
Tap Library, then tap Edit to choose which categories are shown or hidden.
This is where you’ll find the Compilations, (Music) Videos and Genres views, and where you can remove any view from the Library page that you don’t use.
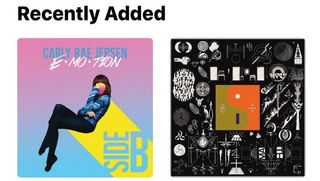
3. Quick access
To change the order that categories are listed in, drag from the handles to the right of them.
Next, tap Done, then swipe upwards to see recent additions to your library. These support the 3D Touch/long press gesture for contextual actions.

4. Get recommendations
Tap For You for recommendations of music you might like, based on your listening habits and things you’ve marked as loved or disliked.
Swipe on rows to see additional items, then apply 3D Touch/a long press to a suggestion to react to it.
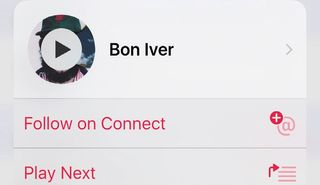
5. Connect with artists
Scroll past the suggestions on the For You page to find posts from artists. Tap the account icon (top right) to review suggested artists, or apply 3D Touch/a long press to an artist name in the Search page’s results for a follow option.

6. Internet radio stations
Tap Radio to listen to Beats 1 or a themed station. Personalised stations you’ve previously created by applying 3D Touch/a long press to an item you chose as an indicator of your mood can be found by scrolling down this page.
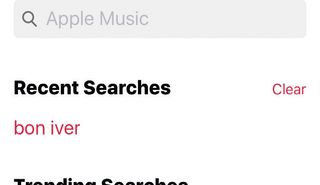
7. Search for music
Tap Search and you’ll see what other people have looked for and your recent searches, saving you typing the same things.
Otherwise, tap in the box, specify whether to look in your library or Apple’s massive collection, then type something.
8. Interact with results
Search results respond to 3D Touch or a long press too, which gives you an option to download an item if it’s already in your library, or to add it to your library and then download it.
Use this to quickly stock up on tracks before you go offline.
9. Browse local music
The Library tab includes a view that shows only music you’ve downloaded for offline playback.
A reminder that you’re not seeing your whole library appears at the top of this view. Tap Library in the bottom bar once to see everything again.
- Enjoyed this article? Get more tutorials, guides, and tips on how to get the most from your Apple devices inside MacFormat. Take advantage of an exclusive offer in our sampler today.
