Advanced macOS Sierra windows management tips
Take control of windows
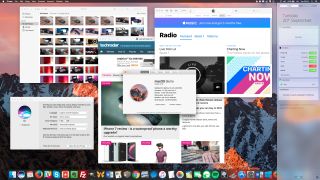
How often do you find yourself dragging a window to roughly the place you want it to fill, and then dragging from a couple of its edges to make it the size you want?
Sadly, macOS Sierra doesn’t have an equivalent to Microsoft’s Window Snap tech to enable you to quickly make a window fill the left or right half of the desktop.
However, it has some hidden shortcuts that are more powerful. In this guide you’ll learn techniques that will help you to wrangle windows more efficiently, so you can quickly get on with more pressing tasks. If you want to learn the basics of window management in macOS Sierra, check out our window management in macOS Sierra guide.
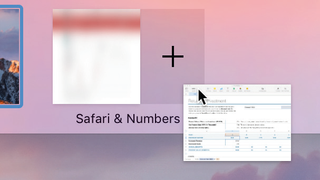
Split View (OS X 10.11 or higher) quickly puts two apps alongside each other, if they both support full-screen mode. In Mission Control, drag a window to an empty spot on the top bar, then drag another onto the space that created.
In that space, drag the divider to adjust the screen split. To exit, put the pointer over the space in Mission Control and click the arrows that appear. Note: two apps may not combine if the screen resolution is too low. On a Retina display, picking a higher ‘Looks like’ resolution in the Displays pane may overcome this
If you’re wondering why you haven’t found these shortcuts already, it’s because they’re the sort of hidden features that require someone to tell you about, or highly insightful experimentation on your part.
Some of the shortcuts you’ll learn about on these two pages have been part of the Mac operating system for years, so you can benefit from them even if you have no choice but to run an old version.
For example, OS X Lion was the first version to enable resizing from any window edge or corner, which you can combine with holding one or two modifier keys to resize a window in two directions at once, for example.
If your Mac is running Sierra, though, you can enjoy additional enhancements Apple has added in this iteration. The great news here, especially if you’ve switched from a Windows PC, is that there’s at last an equivalent to the Maximize command found in Microsoft’s operating system, so you can make a window fill the desktop with a double-click.
Get daily insight, inspiration and deals in your inbox
Get the hottest deals available in your inbox plus news, reviews, opinion, analysis and more from the TechRadar team.
Related to that, you can instantly snap a window’s edge or corner to the same position of the overall desktop – no cumbersome dragging required!
If you need even more control
Earlier, we mentioned Windows Snap. After reading these pages, you may find yourself pining for something more like it, especially if you’ve recently switched from a PC.
One of the following third-party tools will help you out. The simpler option is Magnet . It enables you to drag a window or press a key combo to make the window fill a specific quarter or half of the desktop, or even the whole screen.
Your more powerful option is Moom. A highlight is its ability to save and restore window layouts in an instant by pressing a keyboard shortcut.
For now, though, let’s look at what comes free with your Mac
How to quickly and comfortably resize a window

1. Resize a window
The basic method of resizing a window is to position the pointer over a corner or edge so the cursor changes to a doubleheaded arrow, then hold the mouse or trackpad button and drag in the direction you want the window to grow or shrink.
2. A trackpad trick
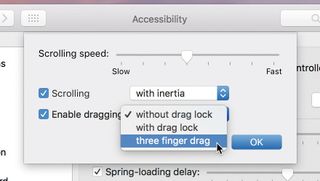
To resize by moving three fingers on the trackpad, rather than pressing as you drag a finger, go to System Preferences’ Accessibility pane, select Mouse & Trackpad, click Trackpad Options and set ‘Enable dragging’ to ‘three finger drag’.

3. Resize in two directions
You can resize a window so that the opposite edge or corner mirrors the movement of the one you drag: hold the Option key on the keyboard while dragging an edge or corner.
This is great for making a window wider – to accommodate a wide web page, say.
How to make big changes even more quickly
1. Maintain proportions
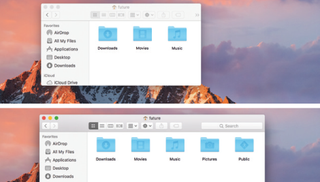
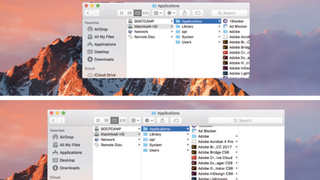
Hold Shift on the keyboard while resizing a window and its relative width and height will be kept the same.
The window is anchored at the point opposite to the one you drag from. Note, the proportions may be overridden below a minimum width or height.
2. Combine the keys
By holding down both Shift and Option and then dragging from a corner or edge, the resizing operation is then anchored at the centre of the window and you end up moving all four of the window’s edges inwards or outwards in unison.

3. Picture-in-picture video
This feature, available in Safari, iTunes and other apps in Sierra, pops a video into its own window that snaps to a screen corner and stays there even if you switch to a full-screen app.
Hold Command when dragging it to position it arbitrarily.
How to make a window fill the desktop
1. The Zoom command
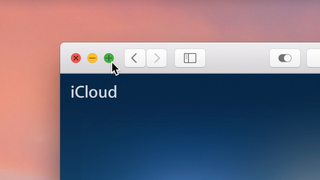
You won’t see the word Maximize in a Mac app’s Window menu, but you will see Zoom. This command expands a window to fill what’s thought to be the best fit for its content.
As a shortcut, hold Option and click on a window’s green button.

2. Fill the desktop
On systems before Sierra, expanding a window to fill the desktop requires you to hold Option and drag from whichever of the window’s corners is furthest from its corresponding screen corner; the window will grow outwards in all four directions.

3. A shortcut in Sierra
It’s much easier in Sierra. Hold Option and double-click on any window corner. This works in many built-in and third-party apps, an exception being iTunes – but perhaps you keep it at a fixed size, or use its Mini Player when you need space.
- Enjoyed this article? Get more tutorials, guides, and tips on how to get the most from your Apple devices inside MacFormat. Take advantage of an exclusive offer in our sampler today.
