
 Become a TechRadar Insider


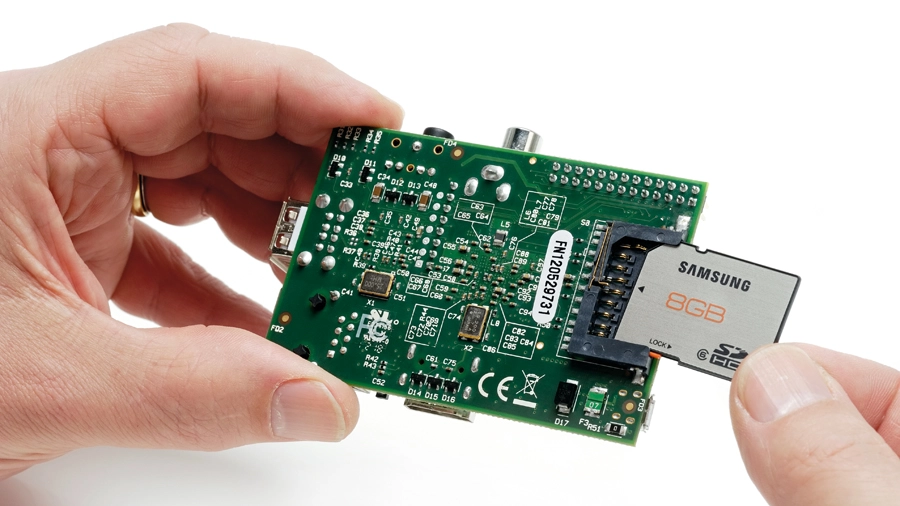
For the price of a USB hard drive, you can turn the Raspberry Pi into a super cheap and supremely flexible network-attached storage box.
To start with, we're going to enable SSH on the device. SSH is a secure shell protocol, and is a way of accessing the command line of your Pi from across your network. This is particularly important with the Pi, because sitting in front of a television isn't the best place for hacking. SSH will let you hack away from any other Linux, Windows or OS X box.
Although SSH is included by default on the Debian distribution we've installed, it's not running. To get it started, log in to your Pi (the default username is 'pi' with a password of 'raspberry'), and type the following:
sudo service ssh start
If you're new to Linux, this line may look as if it's written in a foreign language, but after it's decoded, it's very easy to understand. Single words on the command line usually launch a utility of the same name, or provide instructions to the utility about what to do.
In the above command, 'sudo' is a utility that lets you run other commands with administrator privileges, 'service' is the tool used to run a script from the /etc/init.d directory, and 'ssh start' is the extra information 'service' needs to run - the first being the service to modify - ssh - and the second being what to do with it - start. This could also be stop or restart.
You can find out about commands by typing man followed by the name of the command. Type man sudo, for instance, if you want to discover more about the sudo command.
We also want to start SSH when we boot the Raspberry Pi, and we can do this with another command:
sudo insserv ssh
If you type man insserv, you'll see that this is the command for enabling a script to be run when the system boots, and now that SSH is up and running, you won't even need to connect your Pi to a keyboard, mouse and screen. As long as it's connected to the network, you'll be able to use SSH to control the device remotely - but before you can do this, you need to know the device's IP address.
The Raspberry Pi tells you its IP address at the end of the boot output, but you can also find it by typing ifconfig and looking for the number to the right of 'inet addr' in the eth0 section.
The ifconfig command is powerful and can be used to change lots of thing about the network, as well as outputting the current configuration. The 'lo' device, listed under the Ethernet port, is a virtual loopback device, which is useful for when you want to access services running on the Pi from the Pi itself.
Now you've got the IP address of the Raspberry Pi, from another machine on the same network, type ssh pi@192.168.1.25 - but replace the IP address with your own. You'll be asked for the password, after which you'll find yourself at exactly the same command prompt as on the machine itself, and you can do all the same things you can from the command line through this SSH connection. Welcome to the wonderful world of telecommuting!
Package management

Sooner or later, you're going to want to install additional software on your RPi. On Linux, this is usually done through something called a package manager - a concept that's broadly the same as an app store. You decide what program you want to install, and it's downloaded for you automatically.
On Linux, the download includes any dependencies too, as these are the libraries and applications required to run whatever you want to install. As our Raspberry Pi operating system is Debian, and package managers can be distro-specific, we'll be using Debian's package manager.
The interface to this is called apt - the advanced package tool. As Ubuntu is based on Debian, it uses the same packaging scheme (with different packages), so it's highly likely you'll have already encountered it, although maybe not from the command line. Installing something is as simple as typing:
apt-get install packagename
However, there's an easier way - a utility called aptitude. You can use it on the command line to search for and install packages (aptitude search packagename and aptitude install packagename), but it also offers a primitive command line interface. This appears if you type aptitude on its own, and you'll find it a lot easier to navigate than using the command line alone.
After launch, the package cache has updated and the view is split into three. At the top, there's a menu. Beneath this is a list of packages you can move through with the cursor keys, and below this is the output from any options you choose.
To search for a package, you need to jump to the top menu. A click should work if you've got a mouse attached, even if you're using an SSH connection, but you can also press [Ctrl]+[T] to switch the input focus to the menus manually. The search updates the discovered packages in real time, and you can skip up and down the package list with either the cursor keys or with [Page Up] and [Page Down].
These packages are downloaded from something called a repository. By default, the repository used by Debian is rather strict, and won't contain anything considered not to be part of the Debian operating system, but you can get around this restriction by adding new repositories.
You will find the list of repositories in the /etc/apt/sources.list text file, and you'll need to open this with a text editor as the system administrator. From the command line, you can do this by typing sudo nano /etc/apt/sources.list.

With the file open, you need to add the word contrib to the end of the first line (the one ending with 'squeeze main'). The contrib archive contains free packages that depend on packages listed on the non-free archive - a repository that should already be in your sources.list file. Now type:
sudo apt-get update
You should now be able to install lots of other packages that weren't available initially. We installed the Commodore 64 emulator Vice for example, as a way of putting our Pi in touch with its 80s home computer roots. To get this to work on your own Pi, type apt-get install vice (this wouldn't have worked before).
After that has completed, you need to download the ROMs required by the emulator to run properly. They're part of the Windows version of Vice, but their dubious legality prohibits them from being included with Debian packages. If you are legally entitled to do so, you can unzip the ROMs from the Windows version and put them in the correct location with the following couple of commands:
tar xvf vice-1.5-roms.tar.gz
sudo cp -a vice-1.5-roms/data/*/usr/lib/vice/
You can now start the emulator by typing x64. You'll need to use the emulator while it's connected to a real screen rather than through SSH, but thanks to Vice's point and click interface, you need only to click on the file menu to open a requester and launch your games.
We'd recommend using the autostart option, as this will begin the loading process without you having to remember to type LOAD "*",8,1 followed by RUN to launch the default game on any disc image.
We got pretty good performance out of the emulator, and we were able to play most games at around 100 per cent speed. Even if the framerate occasionally drops below 10 per cent, the games are still playable.
Working sound

The reason why there's no working sound, at least with the early version of Debian we're using, is because the driver to handle the sound device hasn't been loaded. Linux drivers are different to Windows drivers, just as its packages are different to downloadable executables, and drivers are usually part of the kernel rather than separate entities that need to be downloaded and installed.
This is why so many devices work without any manual intervention - the kernel detects their presence and loads the driver automatically. Drivers that can be loaded dynamically like this are called 'modules', and if you type sudo lsmod on the command line, you'd usually see a long list of the modules that have already been loaded.
However, because the distributions built for Raspberry Pi know exactly what kind of hardware they're running on, they have no need of most of the modularised drivers. Except sound. Our installation shows just one - fuse - which is a module to allow users to dynamically mount remote filesystems.
The sound module should already be part of your distribution, and you can load it by typing:
sudo modprobe snd_bcm2835
If you type lsmod again, you'll see that this module has been loaded, along with any of its dependencies. These are modules the sound driver needs to work.
You can now check sound is working from the desktop by plugging a pair of headphones or speakers into the Pi's audio output and running the Music Player application from the Sound and Video menu. The Debian installation even includes a piece of music for you to test.
With audio now working, you'll need to re-enable sound in the Vice emulator to hear anything. As this starts to push the CPU to the limit, we'd also recommend lowering the sample rate, increasing the buffer and fragment sizes and turning off filter emulation in Vice's settings menus.
We've found the sound module to be pretty flaky on the Raspberry Pi, sometimes hanging audio apps. This might be why it isn't enabled by default, but if you do want to load the module at boot time, just add the name of the module (snd_bcm2835) to the /etc/modules with a text editor.
You'll need to be the system administrator to write the changes back, but you should find that the module is loaded automatically when you restart the Pi. Just delete this entry from the file to stop the module loading, or type rmmod snd_bcm2835 to remove the loaded module while the system is running.
File sharing

For our last trick this issue, we're going to turn our Raspberry Pi into a NAS. This will enable you to attach a USB hard drive to the unit and share those files across the network. Combine this with sound playback on the unit, and you could even start to use the Raspberry Pi at the centre of a media hub - sharing files and playing music, all controlled from a remote connection.
At the core of this functionality is a tool called Samba, which is a stable and widely used reimplementation of Microsoft's networking protocol. As this is used by Windows, OS X and Linux to access remote shares, it's the best way of setting up a file sharing server that everyone can access. It can be installed with a single command:
sudo apt-get install samba
After the installation has completed, two background processes will start. Processes like these, and the SSH server we started earlier, are usually called daemons, and they'll automatically handle any requests that are made over the network.
We now need to define the part of the filesystem we're going to use to store the files. As we're going to be using a remote drive connected via USB, we need to create a point on the filesystem for this to be accessible, and make sure it's permanent.
After inserting a USB drive, type dmesg. This displays the output of the system logs, and at the end you should see the part where your system is dealing with the inserting of the USB stick. Look in this output for something like sda: sda1; it might be exactly this, or it may be sdb. Either way, this is your unit's node on the virtual filesystem Linux uses to manage devices. Take a look in /dev/ for an overwhelming list of what's possible.
In order to add our device to the system, first we need to create a new folder to act as the root node for the device. We used mkdir/mnt/share to create a folder called 'share' in the pre-existing /mnt folder, then, to mount this folder at boot time, add the following line to /etc/fstab:
/dev/sda1 /mnt/share vfat defaults 0 0
This line takes the form of a source, which is our USB device with a node taken from the output of dmesg, a destination, which is the folder we just created, followed by a filesystem type, the defaults, keyword and two zeros.
The only problematic part of this line is the filesystem type, because we're guessing it's going to be a Microsoft-formatted USB stick (vfat in filesystem parlance). It's far better to reformat the device in the same way we formatted the SD card, and to use a native Linux filesystem, such as ext3. If you do this, change the filesystem accordingly.
Save your changes to fstab and test whether the mount is working correctly by typing sudo mount/mnt/share. If all goes well, you should be able to browse the contents of your USB device by pointing a file browser or the command line at /mnt/share.
Reading and writing
If you find that this doesn't work, take a look at any new output from the dmesg command to get a better idea of what might have gone wrong. Otherwise, your USB device should now mount automatically whenever you start up the Pi.
We now want to make sure that everyone can read and write to the shared folder. We can do this from the command line, using the following two commands:
sudo chown -R root:users /mnt/share
sudo chmod -R ug+rwx /mnt/share
The first of these changes ownership of all the files within the drive because the -R argument means that these changes will be made recursively. The root:users part makes root (the system administrator) the owner, but also assigns a group value of users. In Linux terms, that means any user that's also part of the users group will have group access too.
If you type groups you'll see the list of groups your current user is a member of. If you're using the default 'pi' username, you should see users as part of this list. The second command ensures all files and folders are set to (r)ead, (w)rite and e(x) ecutable for both the user and groups assigned to the files.
We now want to create a user account you can use to access the share. To do this, we first need to create a new local account, then link this to Samba. You'll then need to enter the username and password created in this step whenever you access the Samba share from a remote machine.
You can do this with the following two commands:
sudo useradd smbaccess -m -G users
sudo passwd smbaccess
sudo smbpasswd -a smbaccess
First, we need to add a user called smbaccess and make sure it's part of the group users. Then we set a password for this account, before adding the account to Samba. Now comes the part where we ask Samba to share the mount point over the network, and this can be done by adding the following to the end of /etc/samba/smb.conf:
[public]
comment = Public
path = /mnt/share
valid users = @users
force group = users
create mask = 0660
directory mask = 0771
read only = no
The final step is to restart Samba, which we can do by revisiting the first command from this tutorial:
sudo service samba restart
We're now ready to access our share, and you can do this from any machine on the same network. Just use the smb protocol, followed by the IP address of your Raspberry Pi.
In KDE, for instance, you should type smb://smbuser@192.168.133.1 into either the command launcher or file manager. You'll then see your files, and read and write these from any box on the network.