How to build a Mac for £300
We build a cheap quad core Mac with parts from eBay
Some guides will tell you that building your own Mac is legally grey. It's not grey at all. Apple's OS X license says quite explicitly:
"You agree not to install, use or run the Apple Software on any non-Apple-branded computer, or to enable others to do so."
We're unaware of any individual case where Apple has enforced this condition - though it has pursued companies who make Mac clones for profit vigorously. As a homebrew Mac maker the licensing conditions practically mean that you're on your own if things go wrong. And things quite possibly could go wrong.

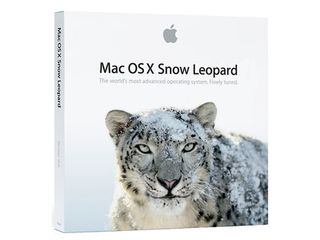
OS: The Snow Leopard upgrade disk costs just £25. If you're planning on installing Snow Leopard on more than one machine, you should purchase the five-license Family Pack
Having got the warning out of the way, there are several fairly reliable methods for getting OS X to run on PC hardware. Let's have a look at two boot loaders that'll do the job. The first is the version I used in my build, iBoot and MultiBeast. Briefly, you'll need a PC built using OSx86 compatible hardware, a legitimate, retail copy of Mac OS X Snow Leopard, iBoot and MultiBeast.
iBoot is a ready to burn CD ISO that will enable your PC to load Chameleon, a boot loader for Mac OS X. You see, Mac OS X was specifically designed to run on Apple hardware only. Chameleon fools your OS X retail disc into thinking that it's being installed on a Mac. There are full instructions at tonymacx86 which I heartily recommend you follow to the letter, but briefly the process should be:
1. Tweak the target machine's BIOS settings so it boots from CD
2. Reboot your computer using the iBoot disk
3. Eject iBoot and insert the Snow Leopard Retail disk when prompted
4. Format your hard drive using Apple's built in Disk Utility
5. Install Mac OS X
6. Reboot your computer using the iBoot disk, again
7. Launch OS X on your homebrew Mac...
Get daily insight, inspiration and deals in your inbox
Get the hottest deals available in your inbox plus news, reviews, opinion, analysis and more from the TechRadar team.

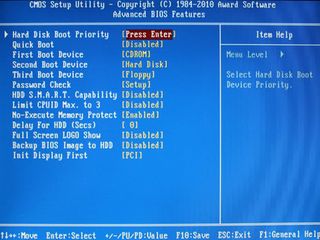
BIOS: You'll need to set your CD drive as a primary boot device and enable AHCI as the SATA/Raid controller type - at least. See full instructions for your chosen boot loader
The second method I'd recommend uses a tool called MyHack. Again, there are full and comprehensive instructions for getting OS X up and running on a custom built PC at MyHack's site. The method is nearly identical, except that MyHack boots from a USB drive, meaning that there's no need to swap CDs. The disadvantage is that you'll need a Mac to prepare the flash drive.
Post install
When I built my Hackintosh, there were still some tweaks to make after the "Welcome to Mac" intro had played. I ran Apple Software Update and downloaded upgrades to the system. In my case it was the combo update to 10.6.4.
When that had finished and been applied, I tested the Mac/PC to see what was working and what wasn't. The sound ports, video settings and Ethernet got a work out. I tried each USB port in turn. My careful planning has worked out. USB and ethernet were fine on the Gigabyte board - but I needed to install drivers for audio and video to get them working properly.

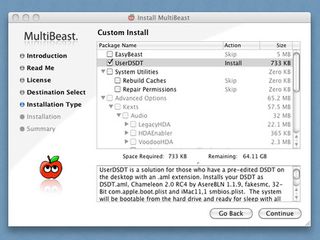
MULTIBEAST: MultiBeast offeres two types of post-installation. You can enable hardware level compatibility using a custom DSDT file and add support for installed peripherals on a driver by driver basis
That's where MultiBeast came in. It's a combination boot sector creation tool and driver installation application. I fired it up on my Hackintosh and was able to select the additional drivers - called "kexts" - I needed, writing them to the local disk.
MyHack has a similar post-installation function, enabling you to write drivers direct to your Hackintosh drive. Crucially, both tools add their boot loader to your local drive, so there's no longer any need to boot from CD or USB stick.
Finally, the moment of truth. I took out the iBoot disk and restarted the machine. It launched into OS X with sound working correctly, running in the native resolution of my Nvidia graphics card.

SUCCESS: If all goes well, this is the screen you'll see when you finally reboot your Hackintosh. If not, it's best to retrace your steps and start again
After all that, did I end up with a suitable substitute for an Mac Mini or even a Mac Pro?
There are some definite cons. The finished machine doesn't look anywhere near as good as Apple's range of computers. Sleep doesn't work properly and I've yet to find a successful workaround for that. And every time I apply new, official updates, my heart pounds in mouth. It's not an undertaking for casual users.
What I do have is a machine that effortlessly copes with video editing, 3D graphics and office applications. It runs creative tools like Photoshop and games like Left 4 Dead 2 without any problems, on Mac OS X.
And all it cost was £300 and a couple of my weekends. Can't be bad.
